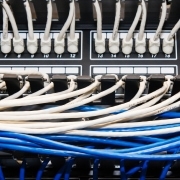
Wire Your Miami House for Ethernet
A wired Ethernet network is the way to go if you’re looking for the most reliable and high-speed internet connection possible. While Wi-Fi is incredibly convenient, it can suffer from interference, sluggish speeds, and dead zones. Ethernet offers unparalleled stability, lower latency (important for gaming!), and the potential for blazing-fast multi-gigabit speeds.
This guide will walk you through everything you need about wiring your house for Ethernet. We’ll cover the basics, the tools you’ll need, and provide step-by-step instructions to make the project as smooth as possible. So get those cables ready; let’s dive in!
Before You Begin: Safety, Regulations, and Choosing the Right Cables
Safety First
Before handling any wiring, it’s crucial to prioritize safety. Always ensure the power is turned off at the breaker box for the area where you’re working. If you’re unsure about this project, consult a qualified electrician.
Know Your Codes
Building codes and regulations on electrical work can vary depending on your location. Always research and abide by your local building codes. This ensures your project is both safe and meets legal requirements.
The CAT Question: CAT 5e vs. CAT 6
Ethernet cables come in different categories. CAT 5e was common in older installations, but CAT 6 is the way to go for a future-proof setup. CAT 6 cables support 10 Gigabit Ethernet speeds faster, making them ideal for high-bandwidth applications like streaming 4K video or transferring large files across your network.
Tools of the Trade: What You’ll Need
To have a successful Ethernet wiring adventure, here’s a list of the tools you’ll want to gather:
- Ethernet Cables (CAT 6): The star of the show! Get enough length to cover your runs, with extra for routing and mistakes.
- Keystone Jacks: These provide clean, modular wall outlets for your Ethernet cables.
- Patch Panel: A patch panel organizes your cables in a central location, making network management a breeze.
- Crimper: This specialized tool secures the RJ45 connectors onto the ends of your cables.
- Punch Down Tool: Used to properly connect wires into keystone jacks.
- Cable Tester: An essential gadget to verify your cables are wired correctly and working perfectly.
- Drill and Drill Bits: To create holes for running cables through walls and ceilings.
- Stud Finder: Helps you locate studs in your walls to avoid drilling into them.
- Fish Tape (Optional): A long, flexible tool for pulling cables through tight spaces or long runs.
Note: You can find kits with many of these tools or purchase them individually based on your needs.
Wiring Your House for Ethernet
Part 1: Running the Cables
Mapping it Out: Before you start drilling, plan your cable routes. Where do you want your Ethernet outlets? Where will your central wiring point (patch panel location) be? Consider the layout of your home and the devices you want to connect.
Attic Access Advantage: If you have a single-story house with an attic, you’re in luck! It usually provides the easiest way to run cables throughout your home.
Drilling Time: Carefully drill holes where needed:
- Attic: Drill down through the wall’s top plate where you want your Ethernet outlets.
- Walls: Drill holes for wall outlets at your desired height.
- Central Location: Drill holes to route cables to your patch panel’s spot.
Important Tip: Be extremely mindful of existing electrical wiring and plumbing when drilling. Use that stud finder to avoid hitting any obstacles within your walls.
Feeding the Wires:
- Attic to Outlet: Drop cables from the attic down through the holes for your outlets.
- Central Location: Feed all your cables towards your patch panel’s location.
Part 2: Terminating the Cables
Keystone Jacks: These offer a clean and easily manageable connection. Mount them into wall boxes or directly onto low-voltage mounting brackets.
Termination Time:
- Strip a short length of the outer jacket of your Ethernet cable.
- Untwist and arrange the individual wires according to the T568A or T568B standard (both work equally well, just be consistent).
- Insert the wires into the correct slots on the keystone jack.
- Use your punch down tool to firmly secure each wire.
RJ45 Connectors:
- Following the same color standard, arrange the wires into the RJ45 connector.
- Use your crimper to secure the connector to the end of the cable.
Testing and Troubleshooting
The Power of the Tester: Your cable tester is your best friend at this stage. Connect it to each of your newly terminated cables to check for:
- Proper Continuity: Ensures all wires are connected and in the right order.
- Shorts: Identifies any wires accidentally touching each other.
- Open Wires: Spots any breaks or disconnected wires.
Troubleshooting Common Mistakes: If the tester reveals issues, don’t worry! Here’s how to handle common snags:
- Incorrect Wiring: Double-check the color order of your wires in the jacks and connectors. Make sure they follow your chosen standard (T568A or T568B).
- Poor Termination: Ensure each wire makes solid contact with the keystone jack. Re-punch connections if needed. Look for any bent pins within the RJ45 connector, and crimp again if necessary.
Tip: Label your cables on both ends as you terminate them. This will make troubleshooting and future changes a lot easier!
Conclusion
Congratulations! You’ve successfully upgraded your home network by wiring it for Ethernet. You should now enjoy a faster, stronger, and more reliable internet connection throughout your house.
Here’s a quick recap of the benefits you’ve gained:
- Blazing Speeds: Unleash the full potential of your internet plan, especially if you have gigabit service.
- Lower Latency: Perfect for gamers and anyone who needs instant responsiveness from their network.
- Reliability: Say goodbye to Wi-Fi interference and signal drops.
If you have any questions or want to see this process in action, feel free to leave a comment below! And if you’re interested in a future tutorial on how to set up your patch panel and connect all those cables, let us know.
Additional Considerations
While we’ve covered the basics, here are a few extra things to think about:
- PoE (Power over Ethernet): Run additional Ethernet cables alongside your main cables to power devices like security cameras or wireless access points without needing separate power outlets. Learn more about Power over Ethernet (PoE): https://en.wikipedia.org/wiki/Power_over_Ethernet
- Conduit: Consider using conduit for your cable runs. This provides flexibility for future upgrades or replacements.


