
Introduction to Residential Network Cabling
In the digital age, the efficiency, speed, and reliability of our digital experiences depend on how we connect our devices at home. Whether streaming a movie, attending a virtual meeting, or playing an online game, the underlying network infrastructure can make all the difference. Let’s delve into residential network cabling and understand its significance.
Importance of Residential Network Cabling
A Foundation for the Future: As we increasingly rely on smart devices, from thermostats to refrigerators, having a robust network foundation becomes essential. Residential network cabling provides this foundation, ensuring that all devices communicate seamlessly. It’s not just about the present; it’s about future-proofing your home for future innovations.
Speed and Reliability: Have you ever experienced video buffering at a crucial movie moment or a dropped call during a meaningful conversation? These frustrations often stem from an unstable network. With a wired network, data transfer rates are consistently high, with minimal interruptions. It’s like having a dedicated highway for your data, free from the usual traffic jams of a wireless connection.
Security: In an era where cyber threats are rampant, the security of your home network is paramount. Wired networks, by their very nature, offer a higher level of security compared to their wireless counterparts. Potential intruders find it challenging to access your network without a direct physical connection.
Wired vs. Wireless Networks
Consistency is Key: While wireless networks offer the convenience of mobility, they can be susceptible to interference from other devices, physical barriers, and even atmospheric conditions. Wired networks, on the other hand, provide a consistent and stable connection, ensuring that your online activities remain uninterrupted.
Bandwidth Bonanza: Think of bandwidth as the width of a pipe. The wider it is, the more data it can carry. Wired connections, especially those using advanced cables like Cat 6 or Cat 6a, offer significantly higher bandwidth than standard Wi-Fi connections. This means faster downloads, smoother streaming, and an enhanced online experience.
The Flexibility Factor: It’s essential to note that advocating for wired networks doesn’t mean dismissing wireless ones. The ideal home network setup often combines both strengths. While critical devices that require stable connections, like desktops or gaming consoles, can benefit from wired connections, mobile devices like smartphones and tablets can leverage the flexibility of Wi-Fi.
Planning Your Home Network
Embarking on the journey to set up a home network can seem daunting, especially with the myriad of technical jargon and equipment choices available. However, you can create an efficient and scalable network with some planning and foresight. Let’s break down the steps to help you design the perfect home network.
Creating a Floorplan
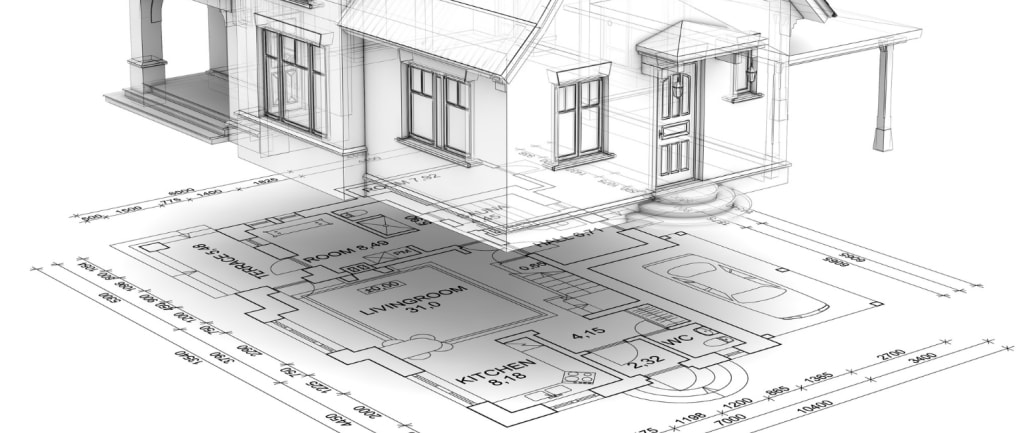
Blueprint Basics: Before diving into the technicalities, start with a simple floor plan of your home. This doesn’t have to be architecturally accurate but should give a clear overview of the rooms and spaces. You can use graph paper, digital tools, or even dedicated apps designed for this purpose.
Mark the Devices: On your floor plan, mark the locations of devices that need a network connection. This includes desktop computers, gaming consoles, smart TVs, and other stationary gadgets. This will visually represent your network’s scope and help determine cable lengths and pathways.
Determining Ethernet Connection Locations
High Traffic Areas: Prioritize areas where you anticipate high network traffic. For instance, a home office or entertainment room might require multiple Ethernet ports for various devices.
Future-Proofing: Always plan for more connections than you currently need. This ensures that as you add more devices or if your usage patterns change, your network can quickly adapt without a complete overhaul.
Router and Switch Placement
Central Location: Ideally, your router should be placed in a central location to ensure even distribution of the Wi-Fi signal. Avoid corners or hidden spots. Remember, while we focus on wired connections, a strong Wi-Fi signal is still crucial for mobile devices.
Accessibility: Switches, which allow multiple devices to connect to your network, should be placed in easily accessible areas, preferably close to most devices. Consider using a dedicated network cabinet or shelf to keep things organized.
Cable Routing Options
Concealed or Exposed: Depending on your home’s aesthetics and structure, you can conceal cables within walls or use cable management systems to keep them organized and exposed. Concealed options offer a cleaner look but might be more challenging to modify later.
Safety First: When routing cables, primarily through walls or ceilings, be wary of electrical wiring, plumbing, or other infrastructure elements. Conduits or cable raceways can help protect your network cables and simplify future upgrades.
Labeling: It might seem trivial, but labeling your cables at both ends can save you a lot of time and confusion, especially when troubleshooting or making changes to your network.
Choosing the Right Materials
The backbone of any efficient home network lies in the materials you choose. Just as a house is only as strong as its foundation, your network’s performance is heavily influenced by the quality and type of cables and components you select. Let’s delve into the specifics to ensure you make informed decisions.
Best Ethernet Cables: Cat 6 vs. Cat 6a
Cat 6: The Standard Bearer: Cat 6 cables have become the standard for modern home networks. They support data rates up to 10 Gbps and frequencies up to 250 MHz. Suitable for most residential applications, Cat 6 cables offer a balance between performance and cost.
Cat 6a: The Advanced Option: Standing for “Category 6 augmented,” Cat 6a cables take performance up a notch. They can handle data rates up to 10 Gbps but at double the frequency of Cat 6, reaching up to 500 MHz. This makes them ideal for environments with high data transfer needs or more extended distance requirements.
Solid vs. Stranded Cables
Solid Cables: These are made of a single solid wire for each conductor. Due to their rigidity, they’re typically used in permanent installations, like inside walls or ceilings. Solid cables perform better over longer distances and are less susceptible to electrical interference.
Stranded Cables: Comprising multiple thin wires twisted together for each conductor, stranded cables are more flexible than their solid counterparts. They’re ideal for patch cables or any application where the cable might be moved frequently. While they might not perform as well over extended distances as solid cables, their flexibility makes them perfect for short-range connections.
Special Cables: Plenum and Riser
Plenum Cables: If you’re routing cables through air circulation spaces like those in commercial buildings, you’ll need plenum-rated cables. These cables are designed to be fire-resistant and, if they do burn, produce less smoke and toxic fumes than regular cables.
Riser Cables: For residential multi-story buildings, riser-rated cables run between floors but not through air vents. They’re designed to prevent fires from spreading floor to floor. While not always necessary for single-story homes, they’re a reasonable consideration for larger residences or townhouses.
Installation Process
Setting up a home network might seem daunting, especially if you dive into Ethernet cabling for the first time. However, the installation process can be smooth and rewarding with the right tools and a systematic approach. Let’s walk through the essential steps to get your network running.
Tools Required
Cable Crimper: This tool attaches RJ45 connectors to the ends of your Ethernet cables. It ensures a secure and proper connection.
Cable Tester: After setting up your connections, it’s crucial to test them. A cable tester will help you ensure that each wire in your Ethernet cable is correctly connected and transmitting data.
Punch Down Tool: Used for inserting your cable into keystone jacks or patch panels, ensuring a secure connection.
Wire Stripper: This tool helps remove the outer insulation of the Ethernet cable, exposing the inner wires for connection.
Scissors or Cable Cutter: For cutting Ethernet cables to the desired length.
Fish Tape or Rods: These tools are invaluable when running cables through walls, ceilings, or tight spaces.
Running the Cables
Plan Your Route: Before you start, revisit your floor plan and decide on the best path for your cables. Avoid running cables parallel to electrical wires to minimize interference.
Measure Twice, Cut Once: Measure the cable length you’ll need for each run, adding a bit of extra length for slack and unforeseen obstacles. It’s always better to have a little extra than to come up short.
Use Conduits: If running cables are exposed, consider using conduits or raceways. These protect your cables and give your installation a cleaner look.
Stay Organized: Label each one at both ends as you run multiple cables. This will make future troubleshooting or upgrades much simpler.
Connecting RJ45 Plugs and Keystone Jacks
Stripping and Arranging: Once your cable is in place, use the wire stripper to expose the inner wires. Arrange them correctly, following the T568B or T568A wiring standard (T568B is more common in residential settings).
Crimping the RJ45: Insert the arranged wires into the RJ45 plug, ensuring each wire goes into its respective channel. Use the crimper to secure the plug.
Punching Down on Keystone Jacks: If you’re using Keystone Jacks, you’ll need to punch down each wire into the jack using the punch-down tool. Ensure you’re following the same wiring standard as the RJ45 plug.
Testing: Once everything is connected, use the cable tester to ensure each connection is solid and transmitting data correctly.
The installation process is all about precision, patience, and organization. While it might take some time, especially if it’s your first venture into network cabling, the satisfaction of a well-executed home network is well worth the effort. Remember, a robust and reliable network starts with a meticulous installation.
Testing and Troubleshooting
You might be tempted to think the job’s done once the cables are run, connectors are crimped, and jacks are punched down. However, the final and arguably most crucial step awaits testing and troubleshooting. Ensuring that your network functions flawlessly is paramount for a seamless digital experience.
Importance of Testing
Ensuring Reliability: Testing ensures that every connection in your network is solid and data transmission is error-free. A well-tested network translates to fewer disruptions and a more reliable digital experience.
Spotting Issues Early: By testing immediately after installation, you can quickly identify and rectify any issues, saving potential headaches.
Peace of Mind: Knowing that your network has been thoroughly tested gives you peace of mind. It’s the assurance that your digital activities, whether work or leisure, will proceed without a hitch.
Using Cable Testers
Functionality: Cable testers are designed to verify that each wire in an Ethernet cable is correctly connected. They can identify issues like miswired connectors, broken wires, or interference.
Process: To use a cable tester, connect one end of your Ethernet cable to the tester and the other to the remote identifier. The tester will then run a series of checks and provide feedback on the cable’s health.
Interpreting Results: Modern cable testers will indicate any issues, often using a combination of lights and sounds. Familiarize yourself with your tester’s user manual to interpret results accurately.
Conclusion
Benefits of a Well-Planned Network Cabling
Optimal Performance: A meticulously planned and executed network ensures optimal performance. Whether streaming high-definition videos, engaging in online gaming, or attending virtual meetings, a well-set network ensures a lag-free experience.
Scalability: A well-planned network is also scalable. As your digital needs grow, your network can easily accommodate additional devices and data loads without requiring a complete overhaul.
Aesthetics: Beyond functionality, a well-planned network is also aesthetically pleasing. With cables neatly routed and organized, your living space remains clutter-free and elegant.
Futureproofing Your Home Network
In an era where our homes are becoming increasingly digital, having a robust home network is not just a luxury but a necessity. By investing time and effort in setting up your network now, you’re not only catering to your current needs but also preparing for the future. As technology evolves and our reliance on digital devices grows, a future-proof home network will stand the test of time, offering unparalleled digital experiences for years to come.
Ultimately, setting up a home network combines technical know-how, meticulous planning, and a dash of foresight. With the right approach, tools, and mindset, you can create a digital haven ready for today’s demands and tomorrow’s innovations.
FAQ
What must I know about ethernet wiring for residential network cabling?
Ethernet wiring is essential for residential network cabling. This involves using cat6 or cat5e cables, connectors, and patch panels to wire your home. These cables can support broadband and provide a reliable network speed. The end of the cable is usually terminated at a patch panel.
How do I choose cat6 and cat5e for my network wiring?
Both cat5e and cat6 cables are common types used in residential cabling. Cat6 is more advanced, offering up to 10 gigabit Ethernet at 250 MHz, while Cat5e provides up to 1 gigabit Ethernet at 100 MHz. Therefore, Cat6 is a better future-proof option, although Cat5e might be sufficient depending on your network speed needs.
What does the term "patch panel" mean in Ethernet wiring?
A patch panel is a crucial part of a home network. It is a component that helps organize cables, ports, and connectors. Usually, the patch panel is used to terminate the end of the cable, enabling a cleaner and more organized space for network installations.
Why is the termination of cables necessary in residential network cabling?
Termination refers to connecting the end of the cable to a device, such as a connector or a port. Proper termination is crucial in maintaining the signal quality and preventing any potential loss of data or crosstalk between cables.
How does the choice of connector affect my Ethernet wiring?
The type of connector used in Ethernet wiring can impact the performance of the residential network. Some common types of connectors used for cat5e or cat6 cables include RJ45 and T568B, determining the network speed limit and promoting ease of installation.
What are the benefits of using a wired network over a wireless one in a home setup?
Wiring a home with cat6 or cat5e ethernet cables has several advantages over a wireless setup. Wired networks provide more stable and reliable network speed, are less prone to interferences, and offer better security. They are also better suited for home automation, connection of network devices, and security cameras.
How can I ensure optimum network speed in ethernet wiring?
To ensure optimum network speed, use high-quality cat6 or cat5e cables and connectors for your Ethernet wiring. Also, ensure proper termination of the cables and use a gigabit Ethernet switch to distribute the network around your home.
How far can I run an Ethernet cable around my home?
Generally, the maximum length for an Ethernet cable, be it cat5e or cat6, is 100 meters (approximately 328 feet) for a single cable run. Cable runs exceeding this distance could reduce network speed and data transfer reliability.
What does structured wiring mean?
Structured wiring refers to a complete home networking system for data, audio, video, or other systems. It includes the termination at a centralized access point. The structured wiring can be part of a more extensive system further to enhance home automation, security, and entertainment.
How do I protect my network cables from damage?
It’s essential to protect your network cables from potential damage. This can be done through careful installation and ensuring cables are not overly bent or pulled. The sheath of a cable also protects the internal copper wire. Hence, avoid pulling on the sheath and damaging it during installation.


