DIY TV Mounting Made Easy: Step-by-Step Guide
In the era of binge-watching and home theaters, the television has become more than just an electronic device; it’s the centerpiece of our living rooms and a gateway to endless entertainment. But have you ever thought about the importance of properly mounting your TV? It’s not just about aesthetics; it’s about safety, optimal viewing experience, and even the lifespan of your television.
Mounting a TV might seem like a task best left to professionals, but with the right tools and a bit of guidance, it’s a project you can take on yourself. Not only does DIY TV mounting save you some bucks, but it also gives you the freedom to customize the placement according to your preferences.
Pre-Mounting Preparation
Before you start drilling holes in your wall, there are a few things you need to consider.
Choosing the Right TV Mount
The first step in your DIY TV mounting journey is choosing the right mount. Not all mounts are created equal, and the right one for you depends on your TV and how you want to view it. There are three main types of mounts:
- Fixed mounts: These are the simplest and most affordable. They hold your TV flat against the wall and don’t allow any movement.
- Tilting mounts: These mounts allow you to tilt your TV up or down, which can help reduce glare.
- Full-motion mounts: These are the most versatile, allowing you to tilt, swivel, and extend your TV in all directions.
Remember, the mount you choose should be able to support the size and weight of your TV.
Finding the Best Location for Your TV
The location of your TV can make or break your viewing experience. Here are a few tips to help you find the best spot:
- Eye level: When seated, your eyes should be level with the middle of the screen.
- Avoid glare: Try to position your TV where light from windows won’t cause a glare on the screen.
- Distance: As a general rule, your viewing distance should be about 1.5 times the size of your TV screen.
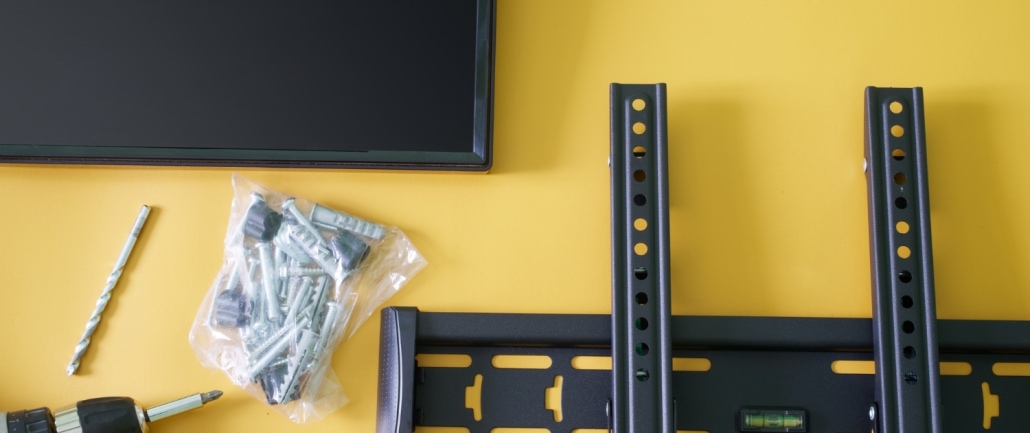
Tools Needed for TV Mounting
Before you start, make sure you have the right tools on hand. Here’s what you’ll need:
- Stud finder: This tool helps you locate studs in your wall, which are crucial for securely mounting your TV.
- Drill: You’ll need this to make holes in the wall for the mount.
- Screwdriver: This is for attaching the mount to the wall and the TV to the mount.
- Level: This will ensure your TV is perfectly horizontal.
- Tape measure: You’ll need this to position the mount correctly.
With these preparations in place, you’re ready to embark on your DIY TV mounting project.
Step-by-Step TV Mounting Guide
Now that you’re prepared let’s dive into the actual process of mounting your TV. Here’s a step-by-step guide to help you through it:
- Identify the Studs: Use your stud finder to locate the studs on your wall. These are the strongest points in your wall and are crucial for a secure mount.
- Mark the Mounting Points: Hold the mount against the wall at your desired height and use a pencil to mark where the screws will go. Make sure the mount is level.
- Drill Pilot Holes: Drill holes into the wall at the marks you made. These should be smaller than the size of your screws.
- Attach the Mount to the Wall: Align the mount with the pilot holes and screw it into the wall. Use a level to ensure it’s straight.
- Attach the Bracket to the TV: Most mounts come with a bracket that attaches to the back of your TV. Follow the manufacturer’s instructions to secure this.
- Mount the TV: With the help of a friend, lift the TV and hook the bracket onto the mount. Make sure it’s secure before letting go.
- Check Your Work: Sit down in your usual viewing spot and check the TV. Make any necessary adjustments to the angle and height.
Remember, safety comes first! If you’re not confident in your ability to lift the TV or if you’re working with a particularly large screen, don’t hesitate to ask for help.
Common Mistakes and How to Avoid Them
Even with the best of intentions, mistakes can happen. Here are some common pitfalls and how to avoid them:
- Mounting the TV Too High: It can lead to neck strain over time. Remember, the middle of the screen should be at eye level when you’re seated.
- Ignoring Studs: Mounting your TV directly into drywall can lead to a disaster. Always use a stud finder to ensure your mount is secured into the studs.
- Skipping the Level: A crooked TV can be a real eyesore. Always use a level when mounting your TV to ensure it’s perfectly horizontal.
- Forgetting About Cable Management: Before you mount your TV, consider how you’ll manage the cables. You might want to invest in some cable ties or a cable management system to keep things neat.
You’ll be well on your way to a successful DIY TV mounting project by avoiding these common mistakes.
Advanced TV Mounting Tips
Now that we’ve covered the basics let’s dive into some advanced tips that can take your DIY TV mounting project to the next level.
Cable Management: Nothing ruins the sleek look of a wall-mounted TV like a tangle of cables hanging down. There are several ways to manage this. You can use cable ties to bundle them together, use a cable cover that matches your wall, or for a more advanced solution, consider installing a cable management system that allows you to run the cables inside your wall.
Mounting on Different Wall Types: Not all walls are created equal. If you’re dealing with a wall type other than drywall, such as plaster or brick, you’ll need to use specific mounting techniques and tools. For example, you might need to use toggle bolts instead of regular screws for plaster walls. For brick walls, you’ll need a masonry drill bit. Before starting the project, always research the best methods for your specific wall type.
Conclusion
Mounting a TV might seem like a daunting task, but with the right preparation and a step-by-step approach, it’s a project that’s well within your reach. Not only can it enhance your viewing experience, but it can also give your living room a sleek, modern look. Plus, the satisfaction of having done it yourself is a bonus that’s hard to beat.
Remember, the key to a successful DIY TV mounting project lies in careful preparation, having the right tools on hand, and taking the time to do it right. So why not give it a try? You’re well-equipped to take on this project with the tips and guidance provided in this guide. Happy mounting!
Need a Hand with Your TV Mounting Project?
While DIY projects can be rewarding, we understand that not everyone has the time or confidence to mount their TV. That’s where we come in. Our professional TV mounting services are designed to provide you with hassle-free, secure, and perfectly leveled TV installation.
Our team of experts has the skills and experience to handle any type of wall or TV model. We also offer advanced solutions like in-wall cable management to give your setup a clean, wire-free look. Plus, we’ll take the time to ensure your TV is positioned for optimal viewing comfort.
So why not sit back, relax, and let us do the heavy lifting? Click here to schedule your TV mounting service today. We’re looking forward to helping you create the perfect home viewing experience!


